Posing Guide 2: Stop Slouching!

Now that we’ve sorted out what to do with our head and how to add a bit of confidence to our face, we need to take a look at how we pose our upper body. Most of us spend a portion of our day sitting at a desk staring at a monitor (as I’m doing right now), and many of us actually spend our entire working day doing this. As a result, we tend to slouch and have bad posture when we stand. Our back is hunched and our shoulders are pushed forward.
In a photo, this can make you look tired, lazy and/or basically lifeless. We certainly don’t get a feeling of energy from such a pose. Just like with your neck, you want to make sure that your upper back is nice and straight. You should, of course, should try to stand a bit taller, but we need to make a big adjustment to your shoulders.
What's wrong with my shoulders?
Having your shoulders pushed forward adds a bit of a curled look to your body and curves your spine. The first thing we want to do is to push those shoulders back a little bit. This will help to straighten out your spine and add a bit more energy to the pose. If you do this while looking in a mirror, you’ll notice an immediate change.
Pushing your shoulders back is a great first step to eliminating the tired, slouchy look, but it introduces another (temporary problem). When your shoulders are pushed straight back, it adds a look of tension to the photo because they appear to be raised. To deal with this, we also want to push your shoulders down a bit. This will relieve the look of tension (and probably give you that good stretch you’ve been looking for).
What’s the next step? Don’t forget to breathe. This serves two important functions. First, breathing is vital to supplying your body with oxygen. Second, if you start to inhale, you’ll notice that your upper body will start to expand while your stomach and waist area start to contract. This will add a bit more shape to your upper body and help create a bit more of an energetic feel.
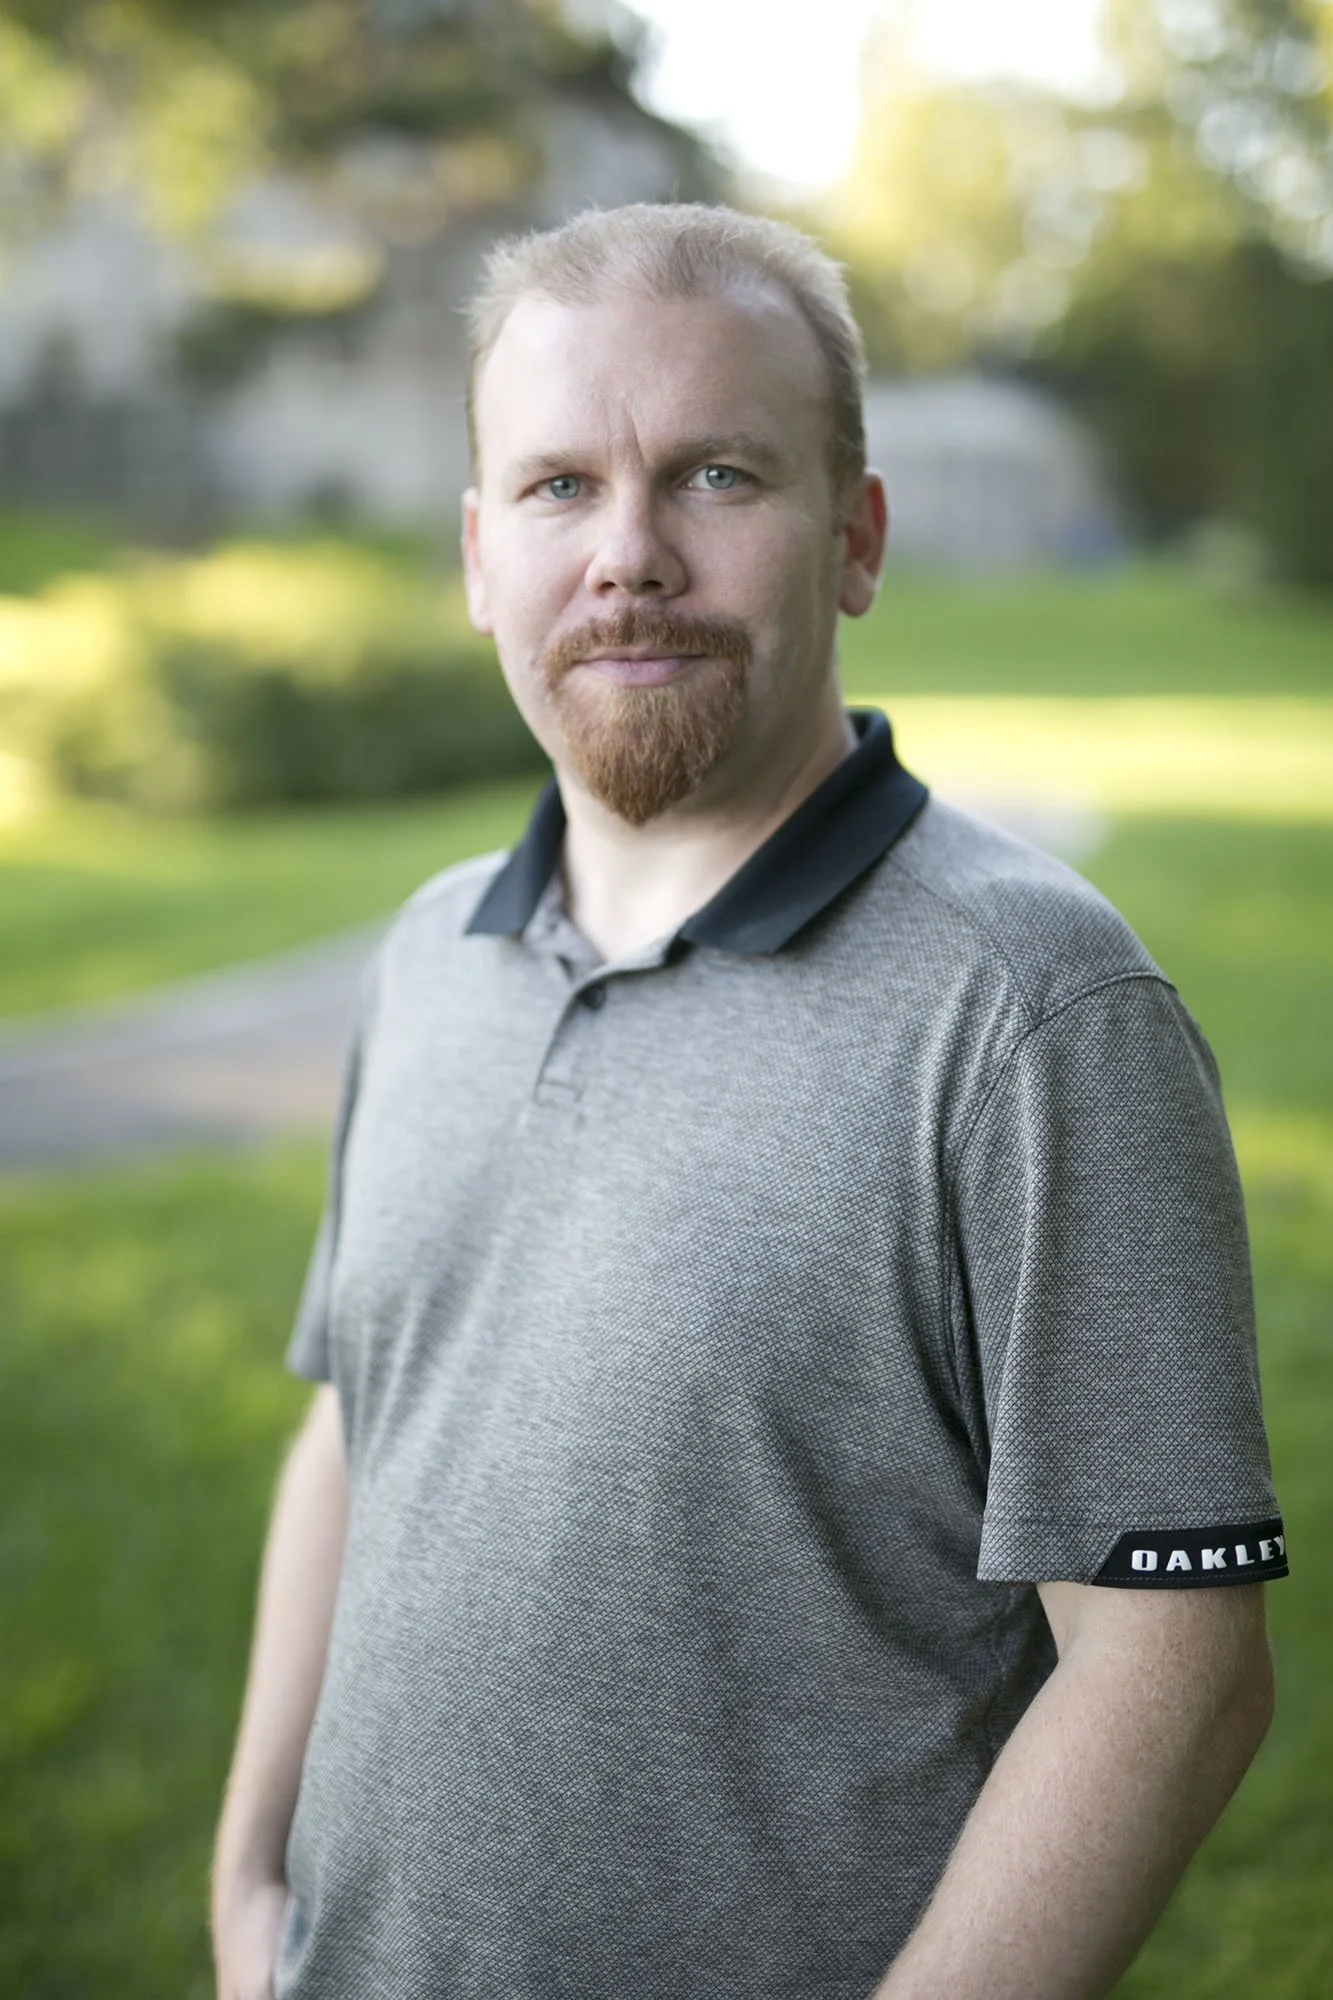
Based on his posture, the model here seems a bit tired and withdrawn.
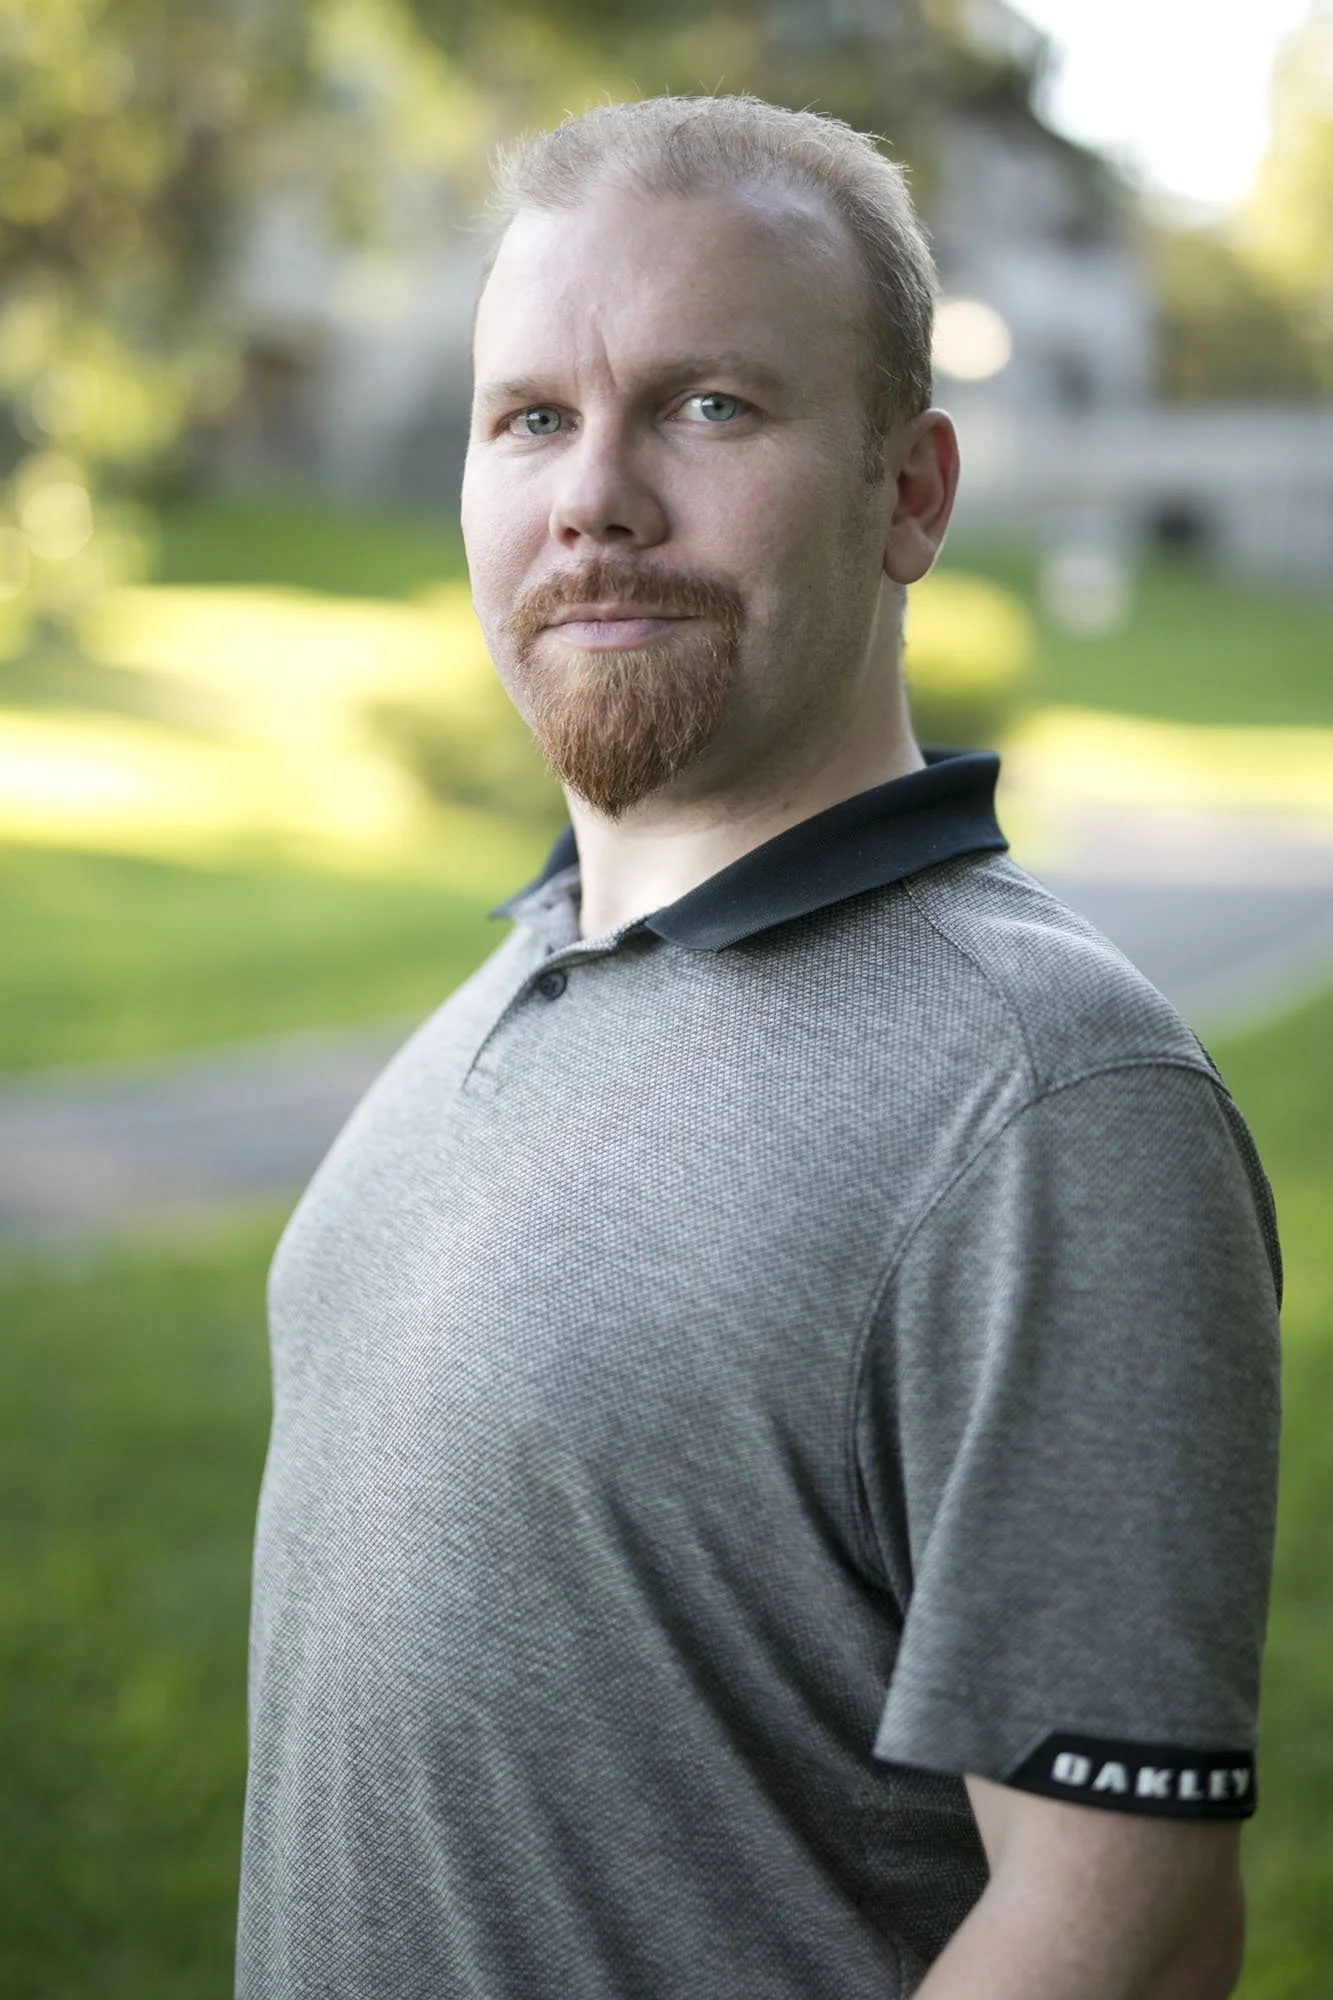
Positioning the shoulders properly makes a big difference! Now he looks energetic and confident
What do I do with my hands?
Finally, we need to figure out what to do with these weird-looking, dangly things hanging off our shoulders that we refer to as, “arms”. In short, the answer is, “anything!” What you definitely want to avoid is having both arms just hanging by your side. First, it just looks awkward. Second, it can actually make you seem bigger than you are, in a bad way. If your arms are pressed against your side, then they have the psychological effect of adding the width of your arms to the width of your body. This is especially the case if you’re wearing long sleeves or you’re wearing a top that is similar in colour to your skin tone. You could be artificially adding 4 or 5 inches to your size!
The simplest way to deal with this is to move your arms away from your body to create a gap. As soon as we see empty space, the problem has been solved. Now we just need to do something interesting with those arms so they aren’t just hanging by your side doing nothing.
Fashion photographers are full of interesting and artistic way to pose your arms and hands, but we’re going to keep it simple. If you have pockets, use them! Putting one hand in your pocket (with the thumb out) or one thumb in your pocket (with the hand out) is simple and works well. It creates a gap between the body and the arm, and it gives the arm a slight angle.
No pockets? No problem! Chances are you’ve got hips. You could place a hand on your hip. Just make sure your fingers are pointed in front and your thumb is in back, and your whole hand and wrist are relaxed.
You could also hold an object. Maybe you have a purse or a cellphone with you? Sling that purse over your shoulder and hold it with your hand.

In this shot, the model seems a bit nervous. Not only are her shoulders forward, but her arms are also pressed against her body, widening them out and making her seem heavier.

Now, the shoulders are positioned better. In addition, we moved the arms so they aren't pressing right against her body. This allows her arms to take a more rounded shape, and the gap between her arms and her body prevents the arms from making her seem wider.
What about...
No! There’s one thing we definitely want to avoid: under almost no circumstances should you fold your arms in front of your chest! It’s not a power pose. It’s a closed-off, withdrawn pose. A portrait should feel inviting, and crossing your arms is about as uninviting as it gets.
We've dealt with proper head positioning and how to add a look of confidence and energy to your upper body. Now we just need to take a look at positioning your legs and lower body. You'll be surprised how much of a difference you can make by just changing how you stand! Take a look at part 3 here.